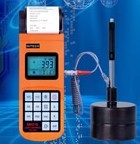
H310 digital hardness tester:

Feature:
Small volume with light weight, it is convenient for taking. Its outline dimensions are
212mm×80mm×32mm.
● Wide measuring range. It can measure the hardness of all metallic materials. Direct
display of hardness scales HRB, HRC, HV, HB, HS, HL and three types of strength values
immediately.
● Large screen LCD, showing all functions and parameters. With EL background light.
● Seven impact devices are available for special application. Automatically identify the
type of impact devices, and with the user calibration function.
● Test at any angle, even upside down.
● Large memory could store 100 groups (Relative to average times 32~1 ) information
including single measured value, mean value, impact direction, impact times, material and
hardness scale etc.
● Battery information showing the rest capacity of the battery and the charge status.
● Original imported high speed thermal printer support the immediate printing function.
It can save data permanently.
● NI-MH rechargeable battery as the power source. With rechargeable battery, charging for
three hours, it can use for two months. Charge circuit integrated inside the instrument.
Continuous working period of no less than 150 hours (EL off and no printing).
● Auto power off to save energy.
● Excellent after-sale service system for high quality products--two years’ guarantee
and all life maintenance. Easy to buy and comfortable to use.
Main Application
● Die cavity of molds
● Bearings and other parts
● Failure analysis of pressure vessel, steam generator and other equipment
● Heavy work piece
● The installed machinery and permanently assembled parts
● Testing surface of a small hollow space
● Material identification in the warehouse of metallic materials
● Rapid testing in large range and multi-measuring areas for large-scale work piece
Technical Specifications
● Error and repeatability of displayed value:
| No. |
Type of impact device |
Hardness value of Leeb standard hardness block |
Erro of displyed value |
Reapeatability |
1 |
D |
760±30HLD
530±40HLD |
±6 HLD
±10 HLD |
6HLD
10HLD |
2 |
DC |
760±30HLD
530±40HLD |
±6 HLDC
±10 HLDC |
6HLD
10HLD |
3 |
DL |
878±30HLD
736±40HLD |
±12 HLDL |
12HLDL |
4 |
D+15 |
766±30HLD
544±40HLD |
±12 HLD+15 |
12HLD+15 |
5 |
G |
590±40HLD
500±40HLD |
±12 HLG
|
12HLG |
6 |
E |
725±30HLD
508±40HLD |
±12 HLE
|
12HLE |
7 |
C |
822±30HLD
590±40HLD |
±12 HLC |
12HLC |
● Measuring range:HLD(170~960)HLD
● Measuring direction:0°~360°
● Hardness Scale:HL、HB、HRB、HRC、HRA、HV、HS
● Display:segment LCD
● Data memory:100 groups max.(relative to impact times 32~1)
● Printing paper: width is (57.5±0.5)mm, diameter is 30mm.
● Battery pack: 6V NI-MH
● Battery charger: 9V/500mA
● Continuous working period:about 150 hours(With backlight off, no printing)
● Communication interface:USB1.1
● Outline dimensions:212mm×80mm×32mm
Configuration
| |
No. |
Item |
Quantity |
Remarks |
| Standard Configuration |
1 |
Main uni |
1 |
|
| 2 |
D type impact device |
1 |
With cable |
| 3 |
Standard test block |
1 |
|
| 4 |
Cleaning brush (I) |
1 |
|
| 5 |
Small support ring |
1 |
|
| 6 |
Battery Charger |
1 |
9V 500mA |
| 7 |
Paper for printing |
1 |
|
| 8 |
Manual |
1 |
|
| 9 |
Instrument package case |
1 |
|
| Optional Configuration |
11 |
Cleaning brush (II) |
1 |
For use with G type impact device |
| 12 |
Other type of impact devices and support rings |
|
Refer to Table 3 and Table 4 in the appendix. |
| 13 |
DataPro software |
1 |
|
| 14 |
Communication cable |
1 |
|
| 15 |
|
|
|
| 16 |
|
|
|
H180 hardness tester>>
H320 portable hardness tester>>
Return to top >>>
|